Nb/ This repair was first posted by me (bodeplot) on www.austech.info forum on 24 Mar 2020. The contents of this post has been replicated here.
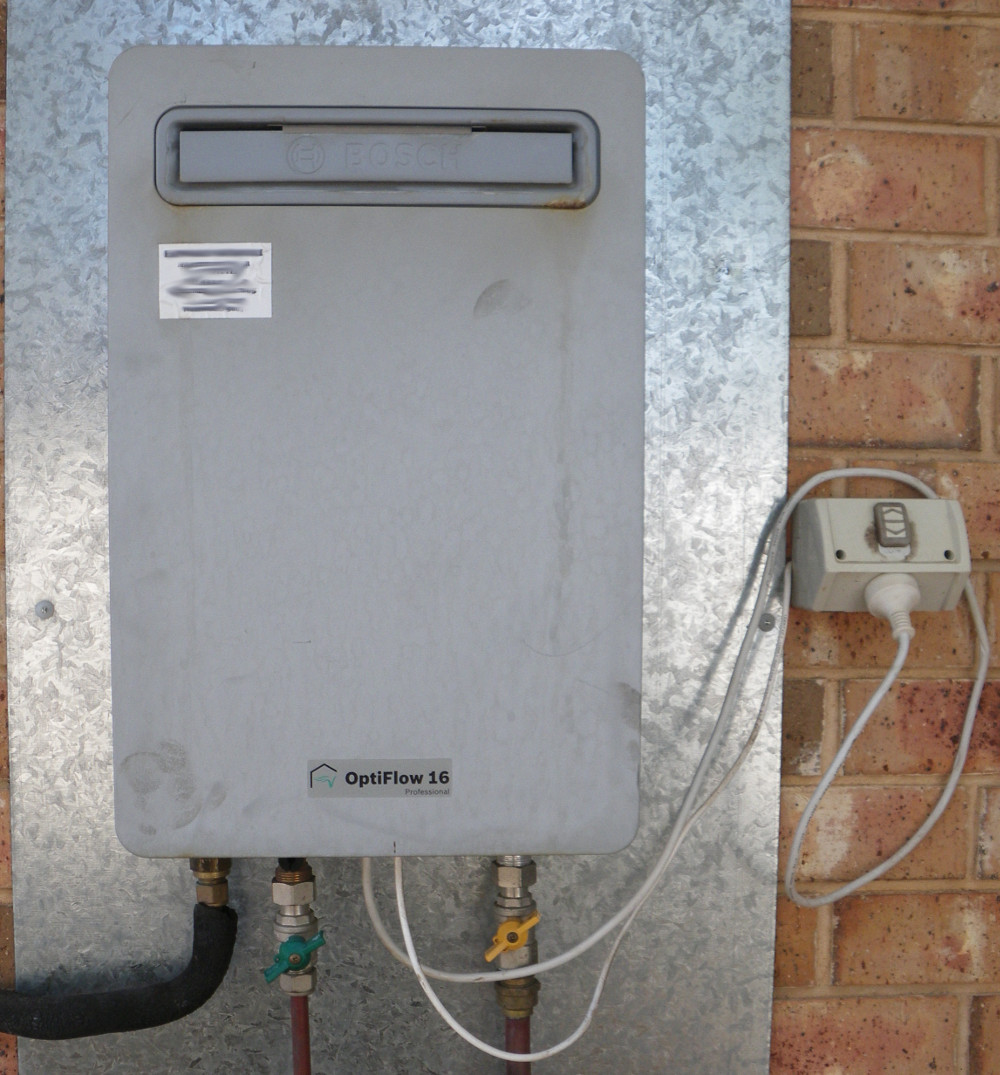
The following is information on how to repair a Bosch Optiflow 16 continuous water heater system. There is a common fault with this heater where hot water will not flow, or that the flow of hot water is pulsated. It is hoped that this page will enable owners to fix their faulty heaters and hence turn them into a working units that will remain serviceable for a few more years.
Inside the heater, there is a servo controlled tap. This tap is the cause of the water blockage and water flow pulsation faults. It is also the thing that (to the annoyance of owners) operates continuously making an annoying humming noise (during early hours of morning). The approach to repairing this product is to disconnect this servo module from the tap and set (or ensure the tap is set) to the open position. With the servo module disconnected from the controller, it is not possible for it to close the tap (or make a noise). However, before disconnecting/isolating this servo module, the servo tap must be in the 'ON' position in order for water to flow through heater (and hence for the fault to be fixed). There is an easy method and a hard method, depending on the current position of the servo controlled tap inside your unit.
The easy way
This can be tried first. Ensure that heater is unplugged from power point. If it is hard wired, then isolate via circuit breaker. With heater disconnected from mains power, go into house and turn on hot water tap. If water is flowing, then excellent !. Follow these steps:
Remove cover (two screws at bottom of cover):
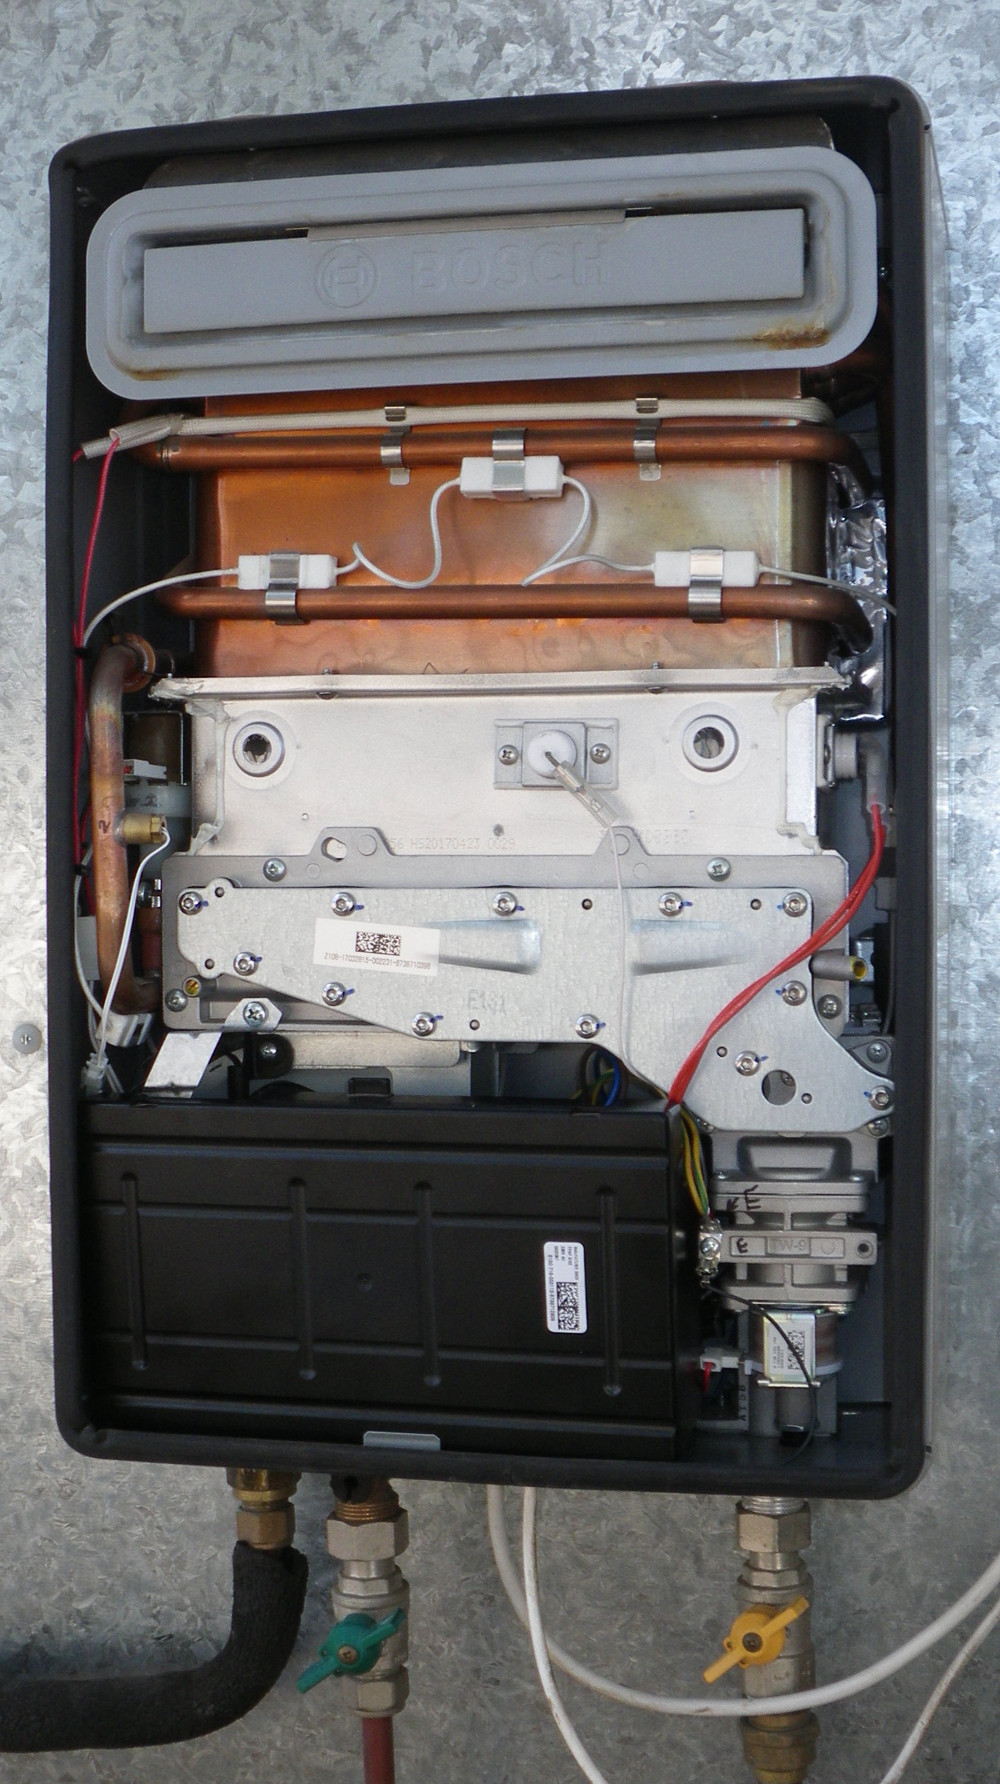
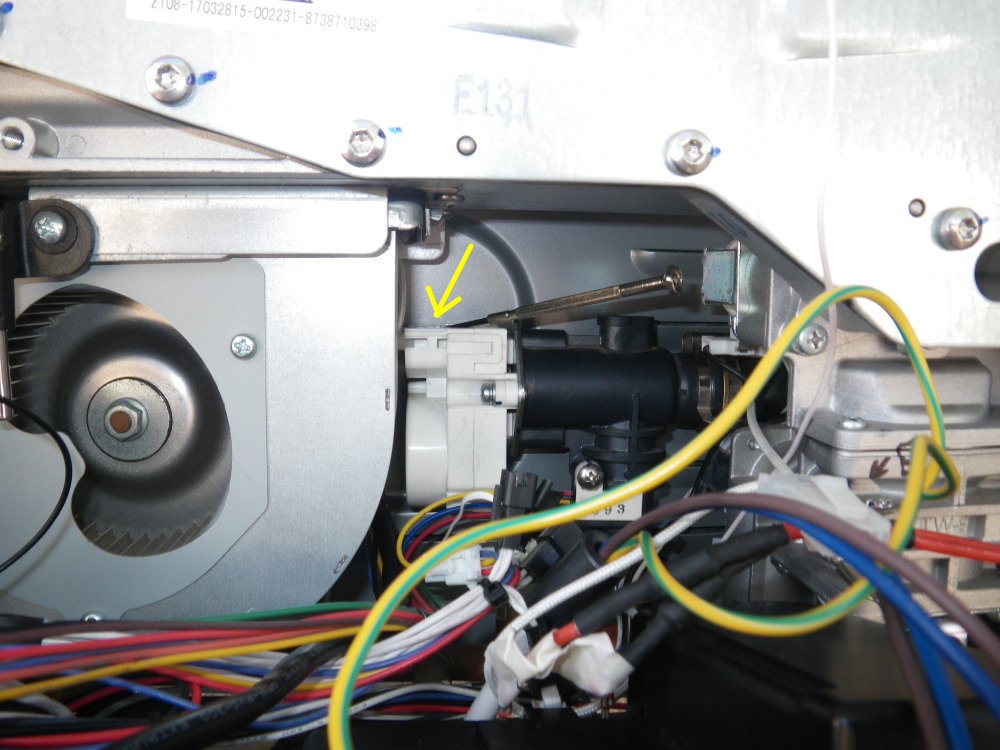
Disconnect sensor wire to allow controller to hang down out of way so that servo tap can be accessed:
Remove controller retaining screw, pull controller out of heater enclosure. Controller should hang down out of way like this:
NB/ If you want to make the images bigger, right click on image and select "View image".
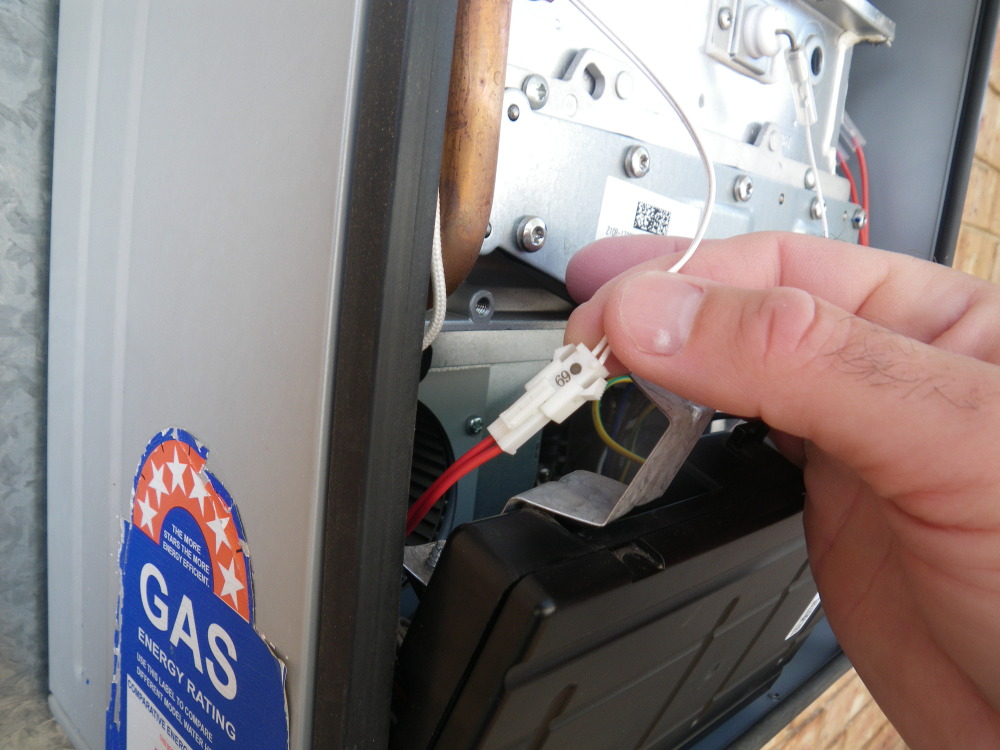
So now you have to get your hand into the unit with a small jeweller's screw driver and push the servo tap module's plug off. It's a tricky job if you have big hands like me.
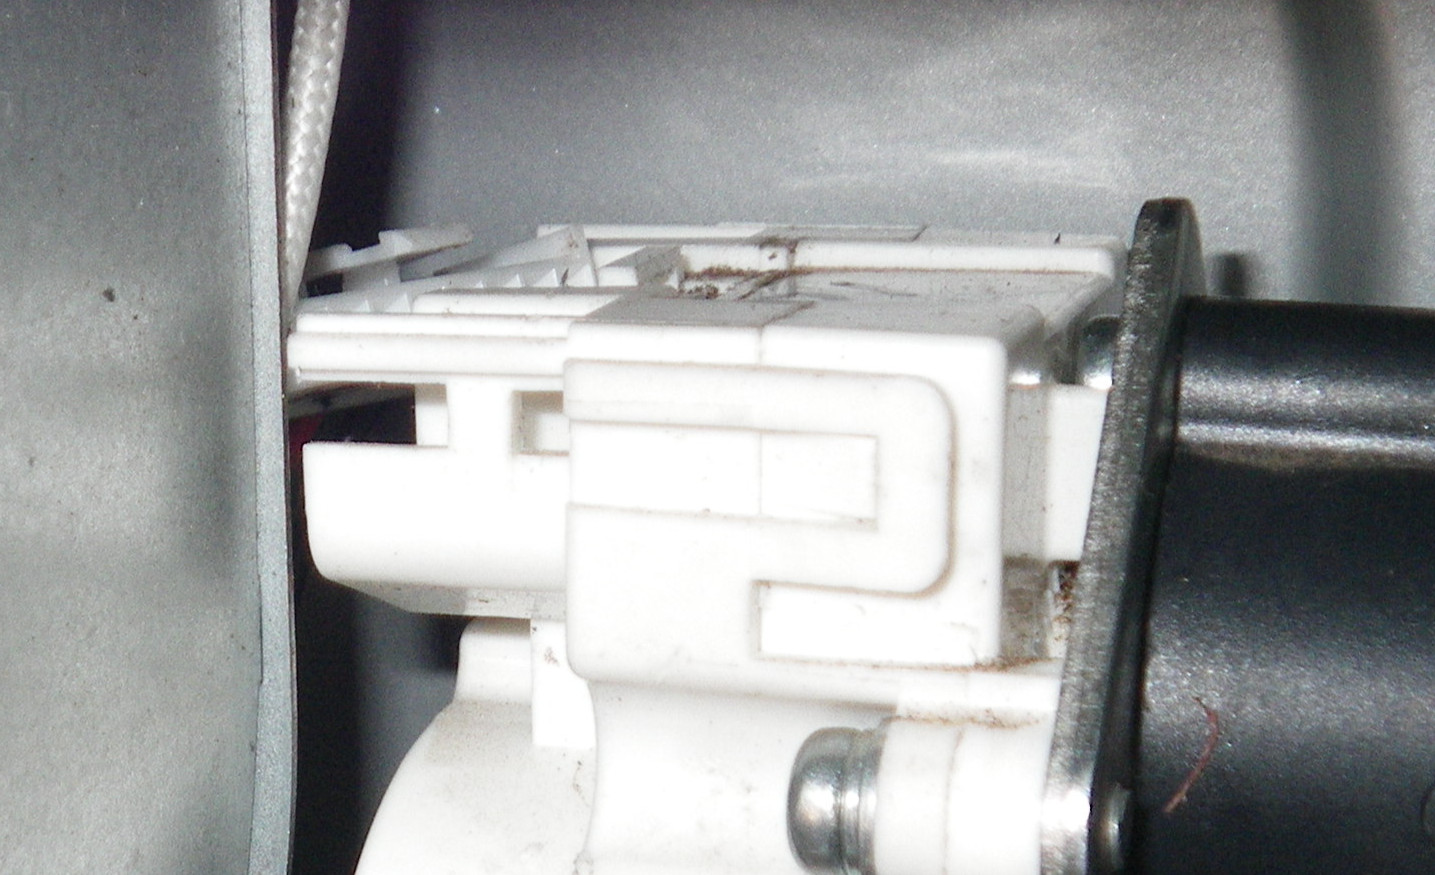
Tap servo plug disconnected:
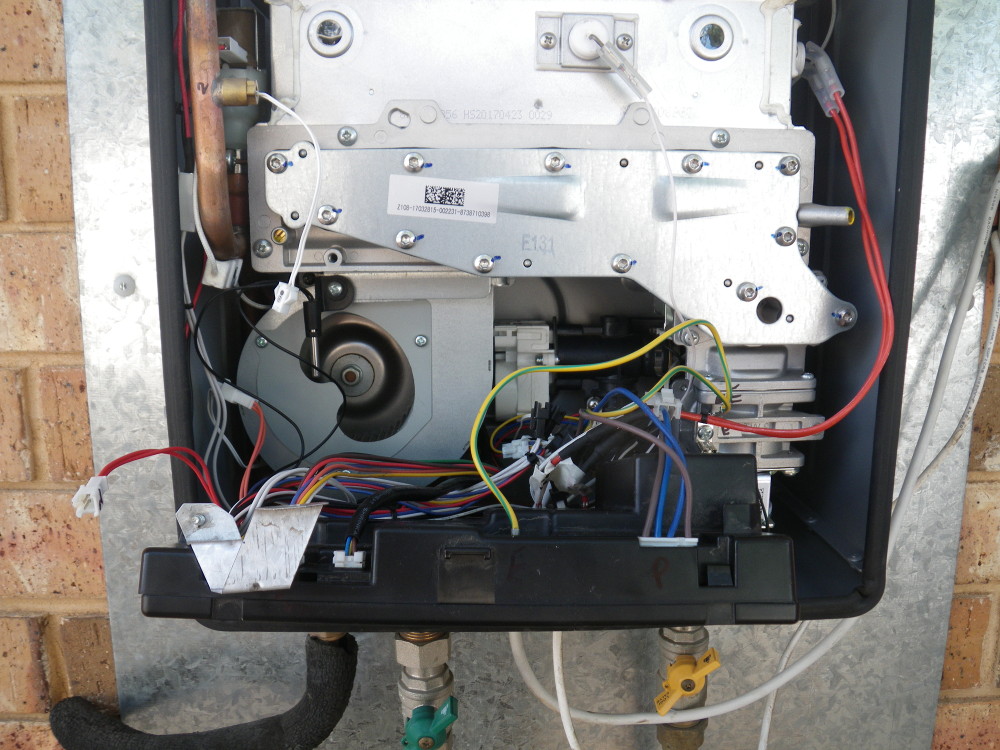
Put controller back and reconnect sensor wire. Return controller to it's position with retaining screw.
Plug heater back into mains and test. You should now have flowing hot water :D
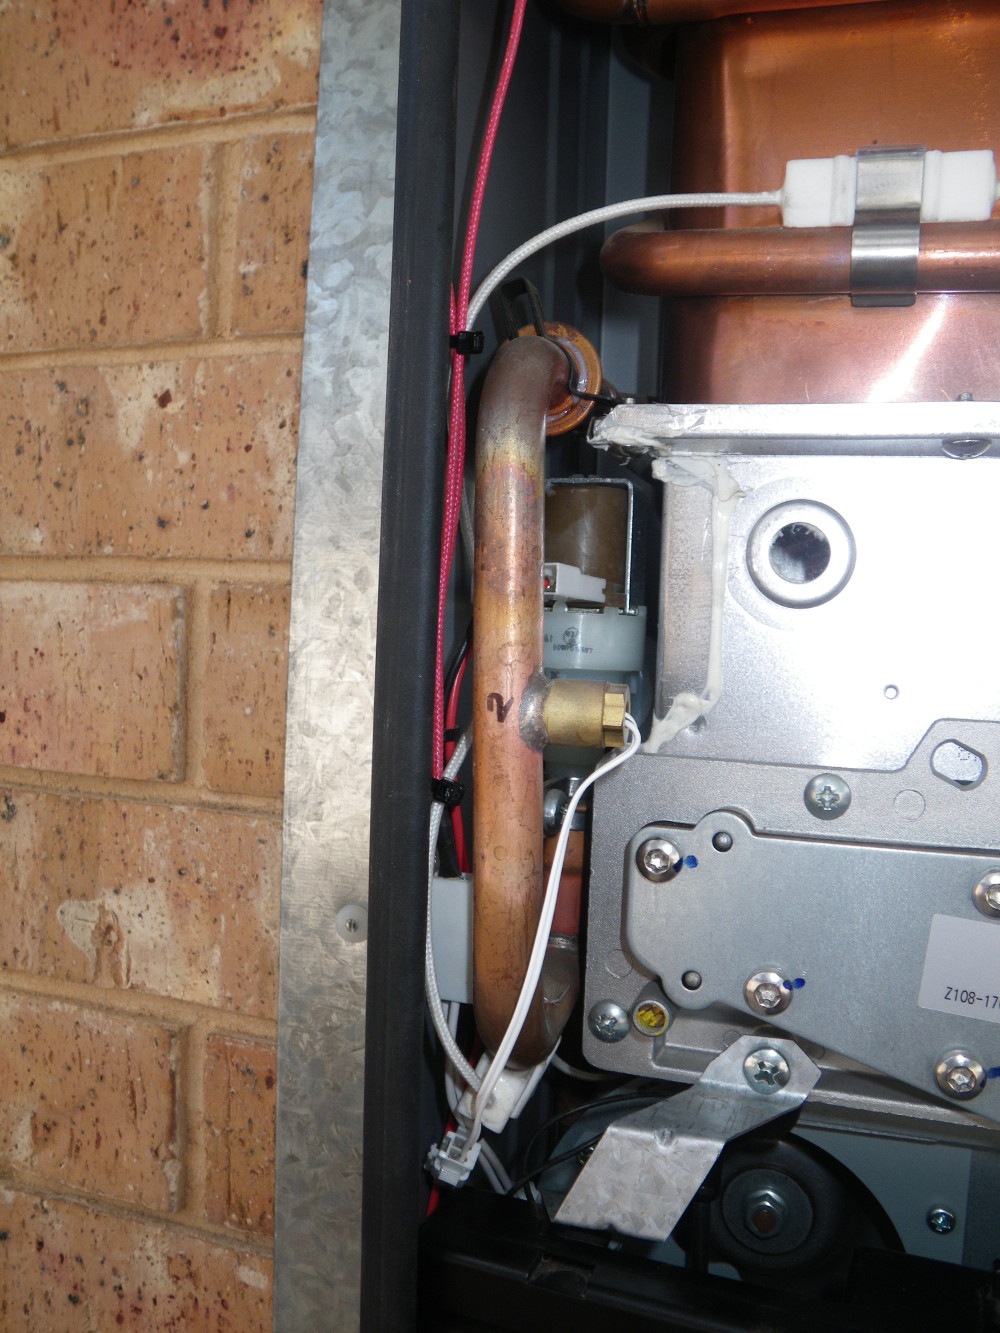
Ensure that cabling running along left side on enclosure are not touching hot water pipe (cable tie them out of the way). Nb/ make sure you disconnect heater before doing this step !
Job done. Pat yourself on head for saving yourself $2000 for a replacement heater.
The hard way
Warning: If you are not electronically/mechanically competant, then do not proceed. Involve somebody who is, or buy a new heater.
Ok, in this instance, you did the above test in The easy way section, and water did not flow out of house tap. So, this means the servo tap inside the heater is fully closed. So you now have to strip down the heater, remove the servo tap, remove the servo, manually set the tap to the 'ON' position and reassemble tap with servo module removed.
Switch off water, gas and disconnect heater from mains. Unfasten heater from wall. There is top screws and bottom screws.
With heater on bench:
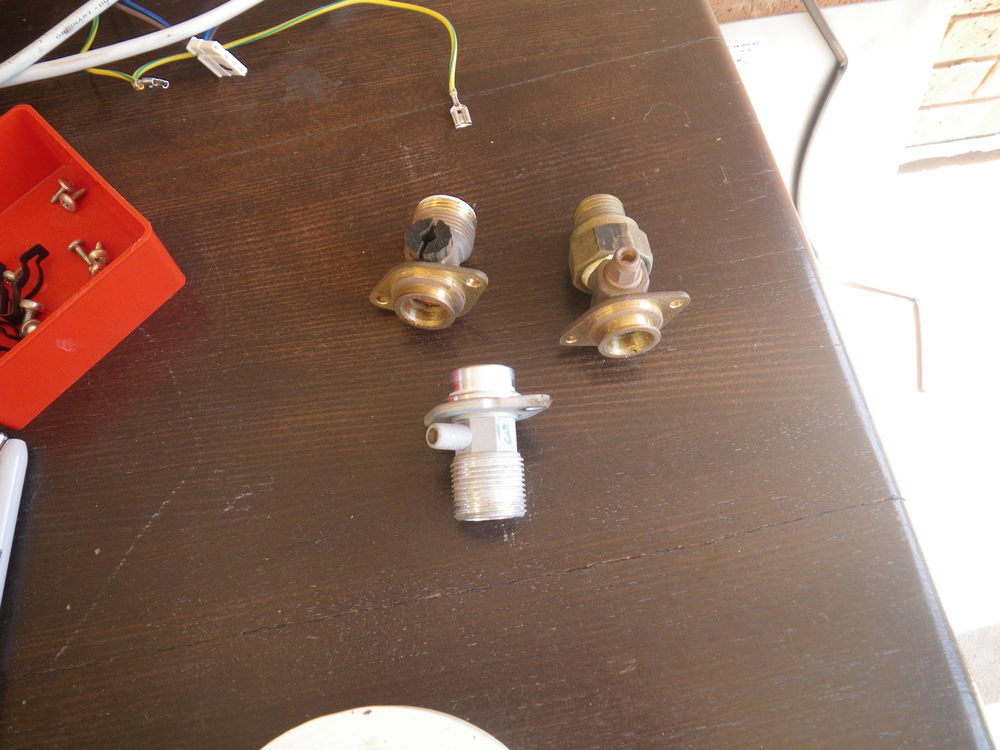
Remove water and gas connectors:
Disconnect wires from controller and remove controller. Tip: label all wires, plugs and sockets. Take some photos.
Remove the four retaining screws that fasten heater to enclosure. Lift heater out of enclosure.
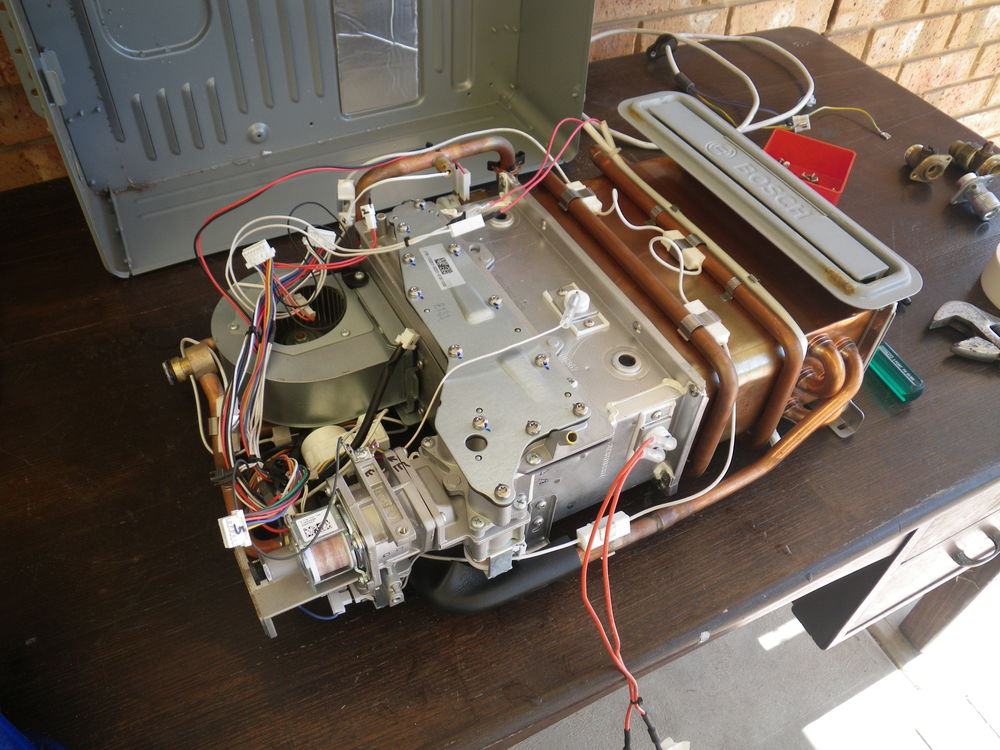
Side view (viewing servo tap):
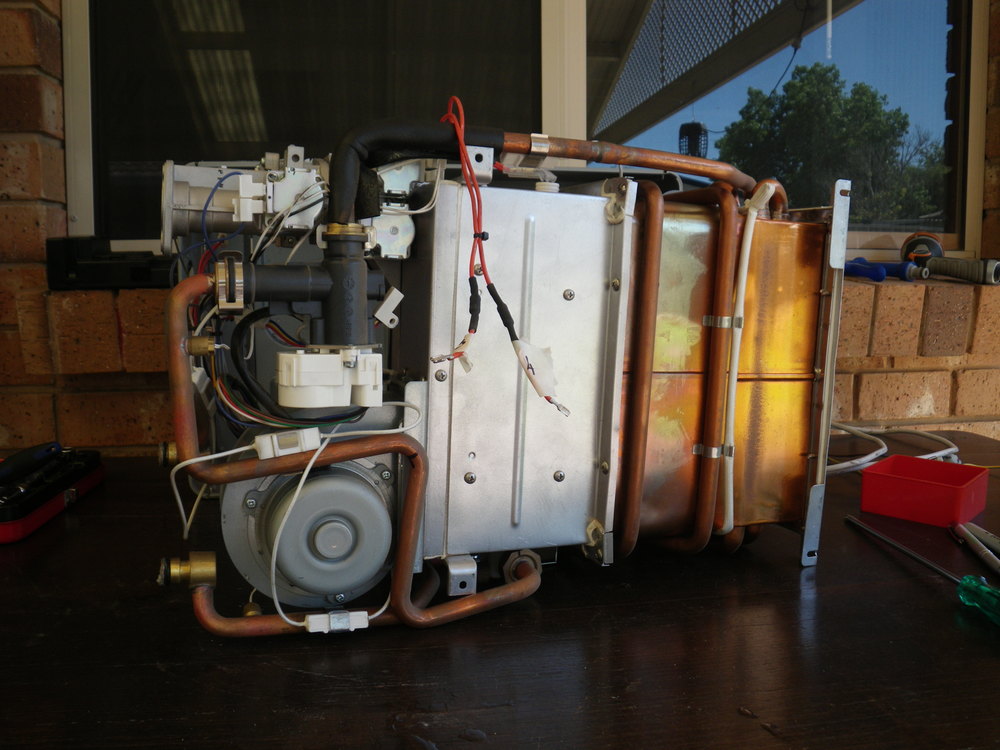
Locate servo tap, and remove clips.

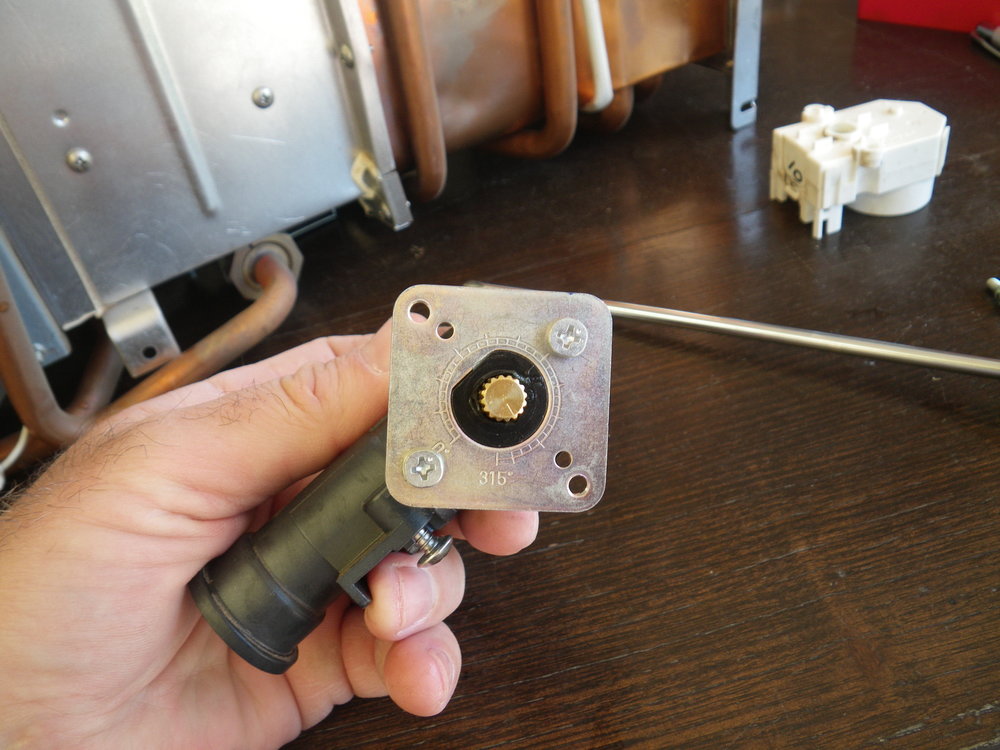
Remove servo controller from tap (2 screws), and set tap to "0 degrees". Blow through tap to ensure that it's free flowing. The tap is ready to be fitted back to heater.
Everything in reverse: Reassemble. Relube all seals with silicon grease.
Nb/ Don't fit servo module back into tap. We don't want module closing off water again (obviously). Nb/ The servo module is the white component on the bench in the above photo - throw it in the bin !
Refit heater back onto wall, reconnect, and test.
Tip: Before you refit controller, check for water and gas leaks by reconnecting and turning on water and gas. Use soapy water in a spray bottle to test for gas leaks (and ofcourse, the best way is our sense of smell). You may have to loosen and retighten the gas connection to get a good seal. If connections are water/gas tight, connect and fit controller, and then test unit. You should have flowing hot water. Well done !
Nb/: The water connectors on the servo tap are a bit deceiving to connect (they will look connected and sealed, but they won't be), and a jet of water from the tap feed will damage a powered up controller (hence why controller should be removed when performing the above mentioned gas and water leak tests).
UPDATE:
22 July 2020: I have been using my modified heater for 4 months, and
it's the best it's been since owning it (and no more humming noises in
the early hours of the morning or when it's over 35C). I am not sure the
purpose of the servo tap. I assume it has something to do with adding a
star to the claimed 5 star rating of this product ?. Either way, this
company has damaged their reputation because of this faulty feature.